I was recently asked by a client how long her site was going to be down during the move to a new host. She was quite happy to hear that there would be no downtime at all! Which got me thinking that this would make a great post. Without further ado, here’s how to switch hosts without any downtime.
The Secret to Switching Web Hosts Without any Downtime
The secret to switching hosts without any downtime is to not cancel your old hosting account until at least a week after your new site is live. Now that I’ve spilled those beans, let’s look at the step-by-step.
How to Switch Hosts Without any Downtime
Here’s a broad stroke step-by-step to moving a WordPress site to a new host:
1) Choose a new host. I like hosts that offer superlative support, staging sites, Let’s Encrypt free SSL, and use cPanel. Siteground is a terrific entry-level host that offers all this. For sites with lots and lots of traffic, I recommend LiquidWeb or WP Engine.
2) Ask for your free website transfer! Yup, your new host should do all the heavy lifting for you. Make sure your SSL certificate is also moved, or install a free Let’s Encrypt SSL after your site goes live.
If you are doing the site transfer yourself, here are some tools I recommend: How to Migrate a WordPress Site.
3) Verify that everything on your new site is just the way you want it. To view your new site, you will need to modify your local hosts file to point your desktop traffic to the new site (since your DNS still points to the old site).
4) Now that you’ve verified that the new site looks good, you need to update it with any new posts or modified posts that were created or modified since your new site was created. You can export/import posts via the WordPress export/import function, or you can use a plugin such as WPSiteSync for Content.
5) Now you can modify your DNS to point your A record to your new host. Be sure to also modify IP addresses at any CDN you may be using.
I recommend not hosting your DNS at your webhost, and am also not a big fan of hosting DNS at my registrar either. I use and recommend DNS Made Easy.
DNS Propagation
DNS Propagation is the time it takes for new DNS records to spread around the world and back again. This “spreading” is known as propagation. Here is why you will not have any downtime during your move: during DNS propagation (24 to 72 hours) some people’s ISPs will be using the “old” DNS and will see your old site, while some will use the “new” DNS and will see the new site. Everybody sees a site!
Want to know which site you are seeing? Install a small PHP program that will reveal your server name. Just copy the following code as which-host.php and upload to both your old and new sites.
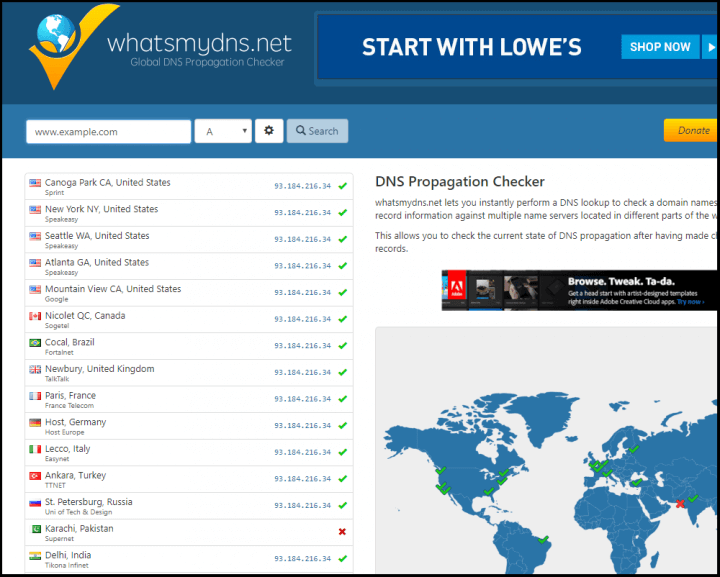
You can keep track of the DNS propagation, by using What’s my DNS?, a global DNS propagation checker. Here’s a screenshot:


Thanks for the amazing and great tutorial. Coming to your section of DNS Propagation, there is a tool that I would like to recommend https://dnschecker.org/ with 100+ public servers available to check the propagation results. So compared to other online tools, that tool provides more detailed propagation results. You must check it out.
I always worry about the downtime when moving my site to a new host. Liquid Web is an amazing web host which does a lot of support for my WP site. Thanks for your guide